According to the U.S. Department of Energy, up to 30% of your home’s heat escapes through windows. That’s nearly a third of the warmth you’re paying for, gone, slipping through cracks you probably haven’t noticed.
And here’s what makes it frustrating: you know your windows are the problem, but the number of solutions out there is overwhelming. Caulk? Weatherstripping? Shrink film? Storm treatments? Which one actually works, and which ones are a waste of a Saturday afternoon?
This guide breaks it all down. You’ll learn the five most effective DIY methods to insulate your windows, find out which approach fits your home and budget, and get a seasonal game plan so your windows perform year-round. By the end, you’ll know exactly where to start, and you won’t need a contractor to do it.
Why Do Your Windows Let So Much Heat Escape?
Even brand-new windows can be weak spots in your home’s thermal envelope. The problem isn’t always the glass itself; it’s the gaps around it. Tiny cracks between the window frame and the wall, worn-out caulk, and loose sashes create pathways for cold air to sneak in and warm air to drift out.
Windows also control how much heat enters and escapes depending on the season. In winter, warm indoor air rises and pushes against the glass, cooling down and creating drafts. In summer, direct sunlight turns windows into heat panels, warming up rooms you’re trying to keep cool. Seasonal temperature swings cause window materials to expand and contract, which opens up even more gaps over time.
The bottom line: small air leaks around your windows make your HVAC system work harder, drive up your energy bills, and leave you uncomfortable no matter what the thermostat says.
What Are the Best Ways to Insulate Windows to Keep Heat Out?
There’s no single fix for every window, but five methods stand out for effectiveness and affordability. Some are quick weekend projects; others take a bit more effort but deliver bigger results.
Comparison Table
| Feature | Shrink Film | Weatherstripping | Caulk | Bubble Wrap | Thermal Curtains |
Cost | $5–$15/window | $3–$10/window | $5–$8/tube | $1–$5/window | $30–$100+/window |
Difficulty | Easy | Easy | Moderate | Very Easy | Easy to Moderate |
Durability | One season | 1–3 years | 3–5+ years | One season | Multiple years |
Blocks Drafts? | Yes (airtight) | Yes (sash gaps) | Yes (frame cracks) | Moderate | Partial barrier |
Blocks View? | Slightly hazy | No | No | Yes | When closed |
Best For | Drafty windows you don’t open | Windows you still open | Permanent frame gaps | Budget/low-use rooms | Bedrooms, living rooms |
| Removable? | Yes (seasonal) | Yes | No (requires scraping) | Yes | Yes |
The Five Methods, Explained
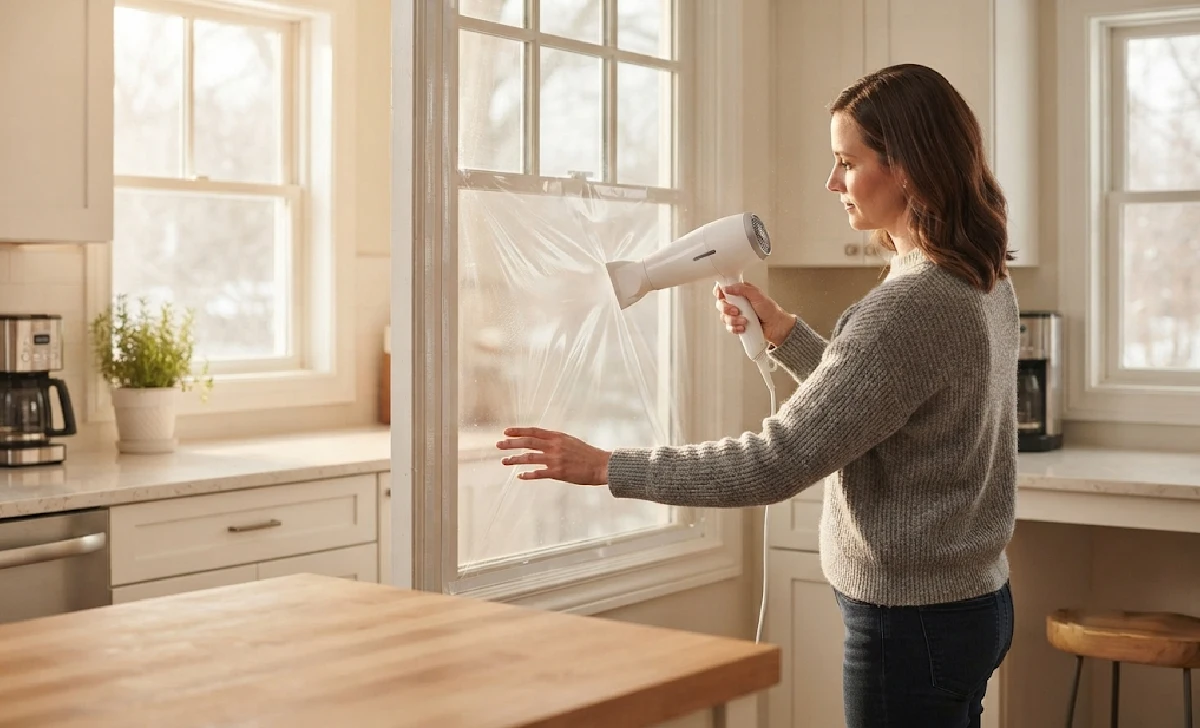
Shrink film window kits are one of the most cost-effective options out there. You clean the trim with rubbing alcohol, apply double-sided tape around the frame, press on the plastic film, and use a hairdryer to shrink it tight. It creates an airtight seal and an insulating air pocket over the glass. The trade-off? Your view gets slightly hazy, and you can’t open the window until you remove it. Kits are available at retailers like Walmart and The Home Depot.
Weatherstripping works best for windows you still need to open. Flexible strips of vinyl foam, rubber, or felt press along the movable parts of the sash, blocking cold air without sealing the window shut. It’s inexpensive, comes in several materials to match your window type, and is easy to replace when it wears down.
Caulk is the go-to for permanent gaps, those tiny cracks where the window frame meets the wall, siding, or interior trim. Use a scraping knife to remove old, peeling caulk first, then apply a continuous bead of silicone or acrylic latex along the edges with a caulking gun. Let it cure overnight. It lasts years.
Bubble wrap is the budget hack that sounds too simple to work, but it does. Cut standard bubble wrap to your window size, spray a fine mist of water on the glass, and press the bubble wrap against it (bubbles toward the glass), securing the edges with masking tape. You sacrifice your outside view, but for basements or rarely used rooms, it’s a surprisingly effective insulator.
Thermal curtains are the finishing touch. Heavy, multi-layered curtains prevent radiant heat loss and act as a physical barrier against cold drafts. During sunny winter days, keep them open to capture solar warmth. At night, close them completely to block cold glass from chilling the room.
Pros and Cons at a Glance
Shrink Film
- Pros: Airtight seal, very affordable, easy DIY application
- Cons: Hazes your view slightly, must be removed to open window, single-season use
Weatherstripping
- Pros: Windows still open and close, inexpensive, quick installation
- Cons: Needs replacement every 1–3 years, less effective for large gaps
Caulk
- Pros: Long-lasting seal, works on permanent gaps, very affordable
- Cons: Can’t open sealed areas, requires scraping old caulk first, messy application
Bubble Wrap
- Pros: Extremely cheap, surprisingly effective, zero tools needed
- Cons: Blocks your view entirely, unattractive, temporary solution
Thermal Curtains
- Pros: Decorative and reusable for years, block drafts and light
- Cons: Most expensive option, only work when closed, don’t seal gaps directly
How Do You Pick the Right Insulation Method for Your Home?
Not every window needs the same treatment. The right approach depends on your home’s age, your budget, and whether you need to open those windows during the colder months.
Older homes with single-pane windows are probably losing the most heat. Start with caulk around the frame to seal permanent gaps, add weatherstripping to the sashes, and apply shrink film for an extra insulating layer. This three-method combination covers almost every leak point.
On a tight budget? Bubble wrap on basement or spare-room windows, paired with draft stoppers along the sill, costs almost nothing and makes a noticeable difference. You don’t need to insulate every window at once; start with the rooms you use most.
For windows you open regularly (kitchens, bathrooms), weatherstripping is your best bet. It blocks drafts without glueing anything shut. Pair it with thermal curtains for added protection when the window is closed.
Renters and apartment dwellers should lean toward removable solutions: shrink film, draft stoppers, and thermal curtains. These won’t damage walls or frames and peel off cleanly when you move out.
How Much Does Window Insulation Actually Cost?
Here’s the good news: insulating your windows is one of the cheapest home improvement projects you can tackle. Most methods cost between $1 and $15 per window for materials. Even if you insulate every window in a typical three-bedroom home, you’re looking at $50 to $300 total, far less than a single winter energy bill in many states.
Thermal curtains are the priciest option at $30 to $100 or more per window, but they last for years and serve double duty as home decor. Caulk tubes run $5 to $8 each and cover multiple windows. Shrink film kits typically run under $15 for a standard window.
The real payoff comes in savings. Sealing and insulating windows can save homeowners up to 10% annually on power bills. For the average U.S. household spending around $2,000 a year on energy, that’s roughly $200 back in your pocket, often within the first season.
If upfront costs are a concern, check whether your household qualifies for the Weatherization Assistance Program, which helps eligible families with both materials and installation.
How to Insulate Windows for Every Season

Window insulation isn’t just a winter project. Each season brings different challenges, and adjusting your approach keeps your home comfortable and efficient year-round.
Winter demands maximum protection. Apply shrink film, seal gaps with fresh caulk, and hang thermal curtains. For larger openings or uneven framing, expanding foam can fill deeper voids that sealant alone can’t reach. Keep curtains open during sunny days for free solar warmth, but close them tight at night.
Spring is the time to peel back the cold-weather layers. Remove shrink film and temporary panels so your windows can welcome natural light and fresh air. Clean tracks, check moving parts, and reinstall window screens. Touch up any sealant that looks worn after winter to prevent gaps from forming later.
Summer shifts the goal from keeping heat in to keeping it out. Reflective window film bounces solar heat before it enters your home, making a noticeable difference on south- and west-facing windows. Exterior shading options like awnings or shutters further reduce heat gain.
Fall is your inspection window. Check every frame for cracks, gaps, or failing sealant that loosened during summer heat. Refresh these areas now so drafts don’t settle in once temperatures drop. Removable insulated panels fit snugly against the interior frame for an extra layer before winter arrives.
What Do Homeowners Wish They Knew Before Insulating?
Most people expect window insulation to be a one-and-done project. It’s not. Caulk and weatherstripping dry out, shrink, and crack over time, especially after a harsh winter or a scorching summer. Checking your seals every season is the difference between staying comfortable and discovering drafts in January.
Draft stoppers are more effective than they look. A lot of homeowners skip them because they seem too low-tech, but they’re surprisingly good at blocking the air currents that sealing alone misses, especially along the bottom edge of older windows or doors.
Don’t forget the sneaky spots. Drafts love to creep in around electrical outlets on exterior walls, exhaust fans, and light switches, places most people never think to check.
The biggest surprise for many homeowners is how much of a difference a simple hairdryer and a $10 shrink film kit can make. You don’t need to replace your windows to feel noticeably warmer. Sometimes the cheapest fix delivers the biggest comfort upgrade.
Conclusion
Key takeaways:
- Up to 30% of your home’s heat escapes through windows, but affordable DIY solutions can save you up to 10% annually on energy bills.
- The best approach combines multiple methods: caulk for permanent gaps, weatherstripping for movable sashes, and shrink film or thermal curtains for added insulation.
- Window insulation isn’t a one-and-done project; seasonal checkups keep your seals tight and your home comfortable all year.
If you’re not sure where to start, walk through your home on a cold day and run your hand around each window frame. The draftiest spots will tell you exactly where to focus first. A $5 tube of caulk and an afternoon of effort can make a bigger difference than you’d expect. Don’t wait for the first hard freeze; get ahead of it now.
Have a window that’s been driving you crazy with drafts? Drop a comment below with the type of window, and we’ll suggest the best insulation approach for your situation.
Frequently Asked Questions
Can I insulate windows without blocking my view?
Yes. Weatherstripping and caulk seal gaps without touching the glass at all. Clear shrink film is nearly transparent once tightened with a hairdryer. If visibility matters, skip bubble wrap and stick with these options.
How long does window insulation film last?
Shrink film typically lasts one season. Most homeowners apply it in early winter and peel it off in spring. It’s designed to be temporary and affordable enough to replace each year.
Will insulating my windows actually lower my energy bill?
According to the U.S. Department of Energy, sealing and insulating windows can save up to 10% annually on power bills. The exact savings depend on how drafty your windows currently are and which methods you combine.
Can I insulate windows in a rental apartment?
Absolutely. Removable options like shrink film, draft stoppers, and thermal curtains work without damaging walls or frames. They peel off cleanly when it’s time to move out.
What’s the cheapest way to insulate a window?
Bubble wrap and water. Spray the glass, press the bubble wrap on (bubbles facing the glass), and tape the edges. It costs a few dollars per window and blocks a surprising amount of cold air, though it does block your view.
Should I insulate windows in summer too?
Yes. The approach just changes. Reflective window film helps bounce solar heat away before it enters your home, especially on south- and west-facing windows. Sealing air leaks around the frame keeps cool air inside where it belongs.
How often should I check my window seals?
At least once per season. Caulk and weatherstripping can dry out, shrink, or crack over time. A quick visual and tactile inspection before winter and summer prevents small gaps from becoming big energy drains.

Other Articles


No Comment! Be the first one.